


Engine oil leaks are one of the most common issues faced by vehicle owners, often leading to significant damage if not addressed promptly. These leaks can arise from various sources, including worn seals, gaskets, or even damaged components. Identifying and repairing these leaks is essential to maintain the engine’s performance and longevity.
In this guide, we will explore effective methods to locate and repair oil leaks in your engine with minimal hassle. Understanding the nature of the leak is crucial–it can either be a simple fix or may require more extensive intervention. Regular maintenance and timely repairs can save you from costly repairs and ensure your engine runs smoothly.
Whether you’re a seasoned mechanic or a beginner, this article provides step-by-step instructions that can be easily followed. By following our guidelines, you can tackle those pesky engine oil leaks safely and effectively, keeping your vehicle in top shape.
Identify the Source of the Oil Leak in Your Engine
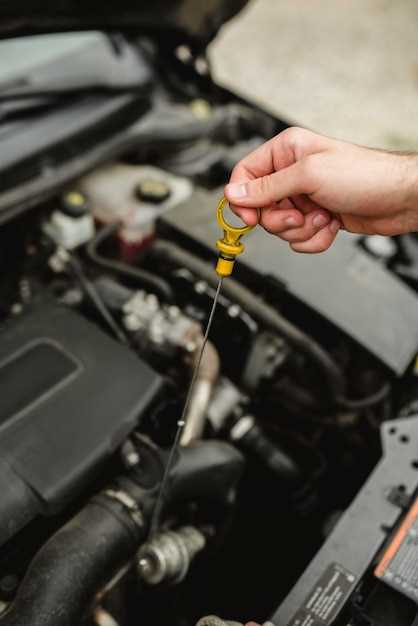
Identifying the source of an engine oil leak is crucial for effective repair and maintenance. The first step in this process is to conduct a thorough visual inspection of the engine compartment. Look for any signs of oil pooling or dripping, as these are clear indicators of a leak.
Common areas where oil leaks occur include the oil pan gasket, valve cover gasket, and oil filter. To pinpoint the leak’s origin, pay attention to areas where oil residue is present. Use a flashlight to illuminate dark spaces that can hide potential leaks.
Heating up the engine can also help in identifying leaks, as warm oil will flow more readily, making leaks more visible. After running the engine for a short period, turn it off and allow it to cool slightly. Inspect the gaskets and seals for any fresh oil, which indicates an active leak.
Another effective technique involves placing a clean piece of cardboard under the vehicle overnight. In the morning, examine it for any signs of dripping. This can reveal the exact location of the leak and help determine whether it is coming from a higher point or lower in the engine.
Once you have located the source of the leak, assess the condition of the gasket or seal in question. If it appears worn, damaged, or improperly seated, it may require replacement. In some cases, tightening bolts around the oil pan or valve cover may remedy a minor leak.
In conclusion, accurately identifying the source of an oil leak is essential for engine repair. A systematic inspection approach and the use of simple techniques can lead to a swift diagnosis, enabling timely repairs and ensuring your engine operates smoothly and efficiently.
Choose the Right Sealant or Repair Method for Your Engine Type
When dealing with engine oil leaks, selecting the appropriate sealant or repair method is crucial for effectively addressing the issue. Different engines may require specific types of sealants or repairs based on their design and the nature of the leak.
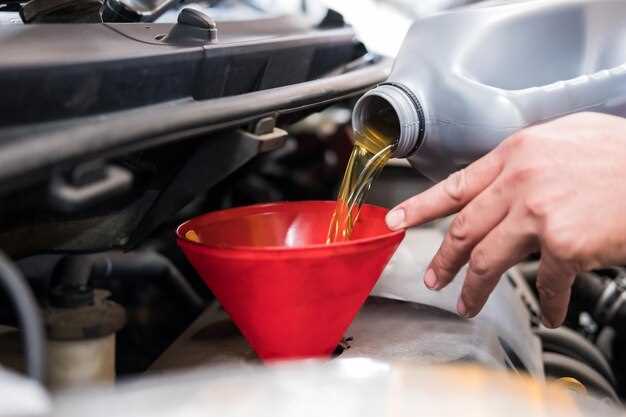
For traditional combustion engines, a silicone-based sealant is often recommended. This type of sealant can withstand high temperatures and offers excellent adhesion properties, making it ideal for sealing oil pan gaskets or valve cover leaks. Ensure the surface is clean and dry before application for optimal results.
If your engine is equipped with a rubber gasket, replacing the gasket itself may be the best approach. Over time, rubber gaskets can degrade, leading to leaks. Properly installing a new gasket can provide a long-lasting solution.
For high-performance engines, consider using specialized adhesives or sealants designed for high temperatures and pressure. These products are formulated to handle the unique stress and conditions that such engines experience, providing a reliable repair for oil leaks.
In cases of minor leaks, using an oil stop leak additive can be a temporary fix. These additives help swell and condition rubber seals, which can reduce leaks without requiring extensive repairs. However, it is essential to read the product specifications to ensure compatibility with your engine type.
Always consult your vehicle’s manual or a professional mechanic to determine the most suitable sealant or repair method for your engine. Taking the time to choose the right solution can prevent further damage and extend the life of your engine.
Follow Safe Practices During Oil Leak Repairs
Repairing engine oil leaks requires careful attention to safety to prevent accidents and ensure effective fixes. Always start by wearing appropriate personal protective equipment (PPE), such as gloves and safety glasses, to protect yourself from harmful substances and debris.
Before you begin any repair, make sure the engine is cool. Working on a hot engine can lead to burns and other injuries. Once you’ve confirmed that the engine is cool, park the vehicle on a flat surface and engage the parking brake. This will help prevent any accidental movement while you are working on it.
Next, ensure you have all necessary tools and materials within reach. This reduces the risk of spills and exposure to oil during your repair. When handling engine oil, be cautious and avoid contact with skin, as engine oil can be harmful. If you do get oil on your skin, wash it off immediately with soap and water.
When identifying the source of the leak, use a flashlight or work light to inspect hard-to-reach areas. This will help you see clearly without the risk of contact with moving parts. If you need to raise the vehicle for better access, use jack stands for support, as they are safer than relying solely on a floor jack.
During the repair process, ensure that you properly dispose of any old oil and materials, as improper disposal can harm the environment. Many auto parts stores offer recycling programs for used oil, so take advantage of these resources.
Finally, after completing the repairs, double-check that all components are secure and free from leaks before starting the engine. Run the engine for a short period, then recheck for leaks, ensuring that your repair is effective and safe.


