


Experiencing a flat tire can be frustrating and inconvenient, but knowing how to handle the situation can save you time and money. In this guide, we will walk you through the process of repairing a tire step by step, ensuring you are prepared for any roadside emergency. By the end of this article, you’ll understand how to efficiently use a repair kit and provide a temporary fix to get back on the road.
Having a reliable tire repair kit is essential for any driver. These kits typically contain tools such as tire sealant, a tire inflator, and a tire plug or patch. Understanding how to utilize these tools correctly can make the difference between a simple repair and a daunting task. Whether you’re at home or on the go, being equipped with the right tools can help you tackle unexpected tire issues with confidence.
In the following sections, we will break down the process into manageable steps. From identifying the puncture to applying the appropriate repair methods, this guide will provide clear instructions to help you restore your tire to working condition. With a little patience and the right approach, fixing a flat tire can be a straightforward task that keeps you moving forward.
Choosing the Right Repair Kit for Your Vehicle

Selecting the appropriate tire repair kit is essential for ensuring that you can effectively address a flat tire situation. A well-suited repair kit can provide the necessary tools and materials to repair minor damages efficiently. Here are some key factors to consider when choosing a tire repair kit:
- Compatibility: Ensure the kit is compatible with your vehicle’s tire type. Some kits are designed specifically for certain tire styles, such as tubeless tires or those with inner tubes.
- Contents: Look for kits that include essential items such as rubber plugs, adhesive solutions, a tire reamer, and a T-handle insertion tool. The more comprehensive the kit, the better prepared you will be.
- Ease of Use: Choose kits that come with easy-to-follow instructions. This will be particularly important in urgent situations where time is critical. Check for user-friendly tools that facilitate a quick repair process.
- Durability: The materials included in the kit should be high-quality. This ensures that the repairs made are both effective and long-lasting, preventing future issues.
- Portability: Consider the size and weight of the kit. It should be compact enough to store easily in your vehicle without taking up too much space, yet still have all necessary tools on hand.
Additionally, it may be beneficial to seek out kits that include extra items such as a pressure gauge, portable air pump, or safety gear. These added features can greatly assist during a tire repair situation.
Before purchasing, read reviews and seek recommendations from trusted sources to ensure you are buying a quality product. A well-chosen tire repair kit can save you time and stress during an unexpected flat tire situation.
Step-by-Step Process for Tire Removal and Repair
To effectively address a flat tire, first prepare your tools, which should include a jack, lug wrench, tire repair kit, and safety equipment. Begin by ensuring your vehicle is parked on a flat surface and engaging the parking brake. This will prevent any movement while you work.
Next, loosen the lug nuts on the flat tire using the lug wrench. Turn them counterclockwise, but do not remove them completely at this stage. Once the nuts are loosened, position the jack under the vehicle’s jacking point, which is specified in your owner’s manual. Carefully lift the vehicle until the flat tire is off the ground.
Now, fully remove the loosened lug nuts and keep them in a safe place. Take off the flat tire by pulling it straight off the wheel hub. Inspect the tire carefully for any visible damage such as punctures or tears; this will help determine if a repair is possible.
If the damage is minor, such as a small puncture in the tread, you can proceed with the repair. Clean the area around the puncture using a scraper tool from your tire repair kit, ensuring that no debris remains. Apply a rubber cement or sealant as directed in your repair kit, then insert a plug into the puncture. Trim any excess material to ensure a smooth surface.
Once the repair is complete, it’s time to reattach the tire. Align the tire with the wheel hub and push it firmly into place. Replace the lug nuts by threading them onto the wheel bolts. Tighten them by hand before lowering the vehicle back to the ground.
After the vehicle is securely on the ground, use the lug wrench to fully tighten the lug nuts in a crisscross pattern. This ensures even pressure and stability. Finally, check the repaired tire for any leaks by sprinkling soapy water over the repair area; bubbles will indicate air escaping.
Your flat tire should now be repaired and ready for use. Always remember to store your tools back in your vehicle for future emergencies and regularly inspect your tires for signs of wear.
How to Properly Inflate and Reinstall Your Tire
After repairing your flat tire, the next step is to properly inflate it using your tire repair kit. Begin by locating the valve stem on the tire and removing the valve cap. This small component is essential for maintaining tire pressure.
Next, connect the air compressor or tire inflator to the valve stem. Ensure that the connection is secure to prevent any air leakage. If you’re using a portable inflator, turn it on to start pumping air into the tire. Keep an eye on the pressure gauge to avoid over-inflation, which can cause further damage.
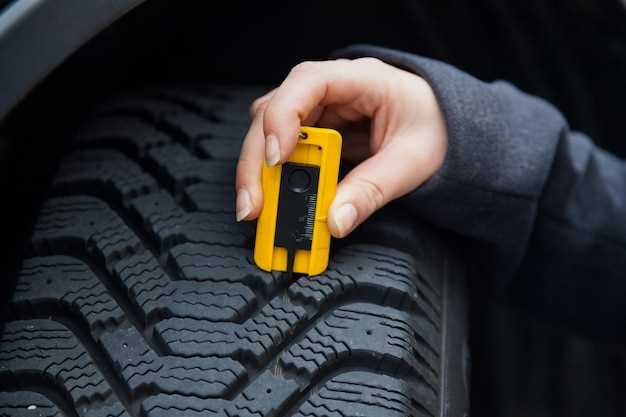
Consult the vehicle’s manual or the information sticker located on the driver’s side door jamb for the recommended tire pressure. Inflate the tire to the specified psi (pounds per square inch). Once the desired pressure is reached, turn off the inflator and disconnect it from the tire.
Replace the valve cap to prevent dirt and debris from entering the valve stem, which can cause leaks. It’s advisable to check the tire pressure again with a gauge to ensure optimal inflation.
Now that your tire is properly inflated, it’s time to reinstall it onto your vehicle. Align the tire with the wheel hub and carefully slide it onto the mounting surface. Ensure that the holes in the rim line up with the lug bolts.
Begin threading the lug nuts onto the bolts by hand to avoid cross-threading. Once all the nuts are in place, use a lug wrench to tighten them in a star pattern. This helps to evenly distribute pressure and securely fasten the tire.
After all lug nuts are tightened, lower the vehicle back to the ground and perform a final check to confirm that each lug nut is secure. Proper inflation and installation of your tire are crucial for safe driving.


