


Cracked bumpers can be an eyesore and may compromise the overall appearance of your vehicle. Fortunately, with the right approach to bodywork, repairing these imperfections is an achievable task. This guide is designed to provide you with a comprehensive, step-by-step process to restore the integrity and aesthetics of your car’s bumper.
Understanding the importance of proper repair techniques is crucial, as an improperly fixed bumper can lead to further damage and costly replacements. Before diving into the repair process, it’s essential to assess the extent of the crack and gather the necessary tools and materials. This preparation will ensure a smoother workflow and a more effective outcome.
This article will take you through each stage of the repair journey, from cleaning and preparing the affected area to applying the right materials and finishing touches. By following these steps, you can not only restore your bumper but also enhance your skills in basic vehicular maintenance.
Repairing Cracked Bumpers: A Step by Step Guide
Repairing a cracked bumper requires careful attention to detail and the right materials. Follow these steps to achieve a professional-looking repair.
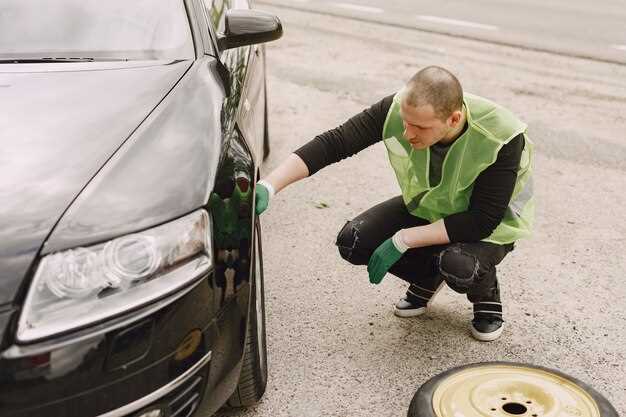
Step 1: Assess the Damage
Examine the crack in the bumper. Determine whether it is a surface crack or if it has penetrated deeper into the plastic. This will guide the method of repair.
Step 2: Gather Necessary Materials
Collect the following items:
- Plastic repair kit
- Sandpaper (80, 220, and 400 grit)
- Masking tape
- Clean cloth
- Plastic primer
- Bumper paint
Step 3: Clean the Area
Thoroughly clean the cracked area using a clean cloth to remove dirt and grease. This ensures proper adhesion of the repair materials.
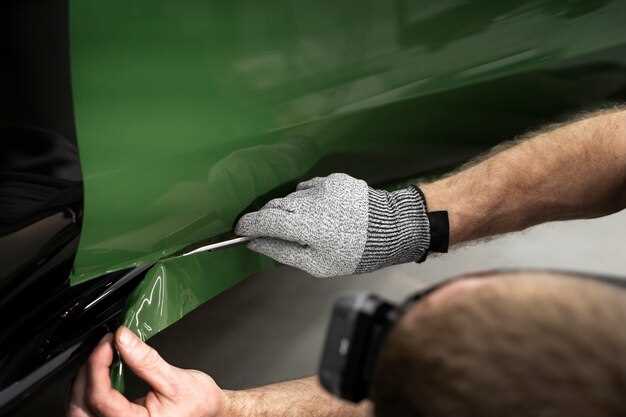
Step 4: Prepare the Surface
Use sandpaper to gently sand the area around the crack. This roughens the surface and helps the repair materials bond better. Make sure to sand to a smooth finish.
Step 5: Apply the Repair Compound
Mix the plastic repair compound according to the manufacturer’s instructions. Apply it to the crack using a smoothing tool, ensuring it fills the crack completely. Allow it to cure as specified.
Step 6: Sand the Repaired Area
Once the compound is fully cured, sand the repaired area with finer grit sandpaper (220 grit) to create a smooth surface. Follow up with 400 grit to refine it further.
Step 7: Prime the Surface
Apply a layer of plastic primer over the repaired area. This prepares the surface for painting and enhances adhesion. Allow the primer to dry completely.
Step 8: Paint the Bumper
Use bumper paint to match the vehicle’s color. Apply several thin coats, allowing each coat to dry before applying the next. This will help achieve a uniform finish.
Step 9: Final Inspection
Once the paint has dried, inspect the repair to ensure it is smooth and matches the surrounding bumper. If necessary, apply additional paint or touch-ups.
Step 10: Cure Time
Allow the bumper to cure for the recommended period after painting. Avoid exposing it to harsh conditions during this time to ensure a long-lasting repair.
| Step | Action |
|---|---|
| 1 | Assess the damage |
| 2 | Gather materials |
| 3 | Clean the area |
| 4 | Prepare the surface |
| 5 | Apply repair compound |
| 6 | Sand the area |
| 7 | Prime the surface |
| 8 | Paint the bumper |
| 9 | Final inspection |
| 10 | Cure time |
Assessing the Damage: How to Identify Crack Severity
When faced with a damaged bumper, it is crucial to assess the severity of the cracks before proceeding with any repair. Understanding the extent of the damage will help determine the appropriate repair methods and materials needed.
1. Visual Inspection
Start by visually inspecting the bumper for cracks. Look for any visible fractures, chips, or other deformities. Identify the number of cracks and their locations. A single crack may be easier to repair than multiple ones.
2. Crack Length and Depth
Measure the length of each crack. Short cracks (less than 3 inches) may signify minor damage, while longer cracks could indicate greater structural issues. Additionally, assess how deep the cracks penetrate into the material. Shallow cracks may be easier to fill and repair compared to deep fractures that may compromise the bumper’s integrity.
3. Wiggle Test
Gently apply pressure around the cracked area. If the bumper flexes or moves significantly, it may indicate more severe damage. A stable bumper is a sign that the damage is likely superficial, whereas movement suggests potential underlying problems.
4. Material Consideration
Identify the material of the bumper. Different materials, such as plastic or fiberglass, may react differently to repair attempts. Some materials are more prone to cracking and can impact the repair process significantly. Understanding the material will also help in choosing the right repair kits.
5. Professional Evaluation
For extensive damage or uncertainty in the assessment, consider seeking a professional evaluation. An expert can provide insights that may not be apparent during a casual inspection, ensuring that the right repair method is chosen.
By properly assessing the damage and understanding the crack severity, you can make informed decisions regarding the bumper repair, saving both time and resources.
Required Tools and Materials for Bumper Repair
Repairing a cracked bumper requires specific tools and materials to ensure a successful outcome. Here’s a comprehensive list of what you will need:
- Safety Gear:
- Safety goggles
- Gloves
- Dust mask
- Cleaning Supplies:
- Soapy water or a degreaser
- Cloths or paper towels
- Sandpaper (various grits)
- Repair Tools:
- Utility knife
- Screwdriver set
- Heat gun (for softening plastic)
- Bodywork Materials:
- Repair adhesive or epoxy
- Plastic filler
- Primer
- Paint that matches your vehicle’s color
- Finishing Tools:
- Putty knife
- Polishing compound
- Buffing pad or cloth
Having the right tools and materials is crucial for effective bumper repair. Ensure that everything is prepared before starting the bodywork process to avoid interruptions and achieve the best results.
Step-by-Step Repair Process for Different Types of Bumpers
Repairing a cracked bumper involves specific steps that vary based on the material of the bumper. The most common types of bumpers are made from plastic, fiberglass, and metal. Below is a detailed guide on how to address repairs for each type.
Plastic Bumpers: Begin by assessing the crack. Clean the area around the crack with soap and water, and then dry it thoroughly. Use a heat gun to soften the edges of the crack slightly, making it more pliable for repair. Apply a plastic adhesive or epoxy to the crack, ensuring even coverage. Once the adhesive has cured according to the manufacturer’s instructions, sand the area smooth and apply a plastic-compatible primer before painting to match the car’s bodywork.
Fiberglass Bumpers: Start by cleaning the damaged area, removing any debris. If the crack is significant, you may want to create a slight bevel along the edges for better adhesion. Mix fiberglass resin and hardener according to the instructions. Apply the mixture over the crack, layering fiberglass cloth for increased strength. Once cured, sand down any uneven areas and finish with primer before painting to ensure a seamless look with the bodywork.
Metal Bumpers: Inspect the bumper for rust or structural integrity issues. Remove any rust with an abrasive tool, followed by applying a rust inhibitor. For cracks, clean the area and utilize a metal welding kit or metal repair epoxy. After allowing sufficient curing time, grind down any welds or excess epoxy to achieve a smooth finish. Finally, prime and paint the repaired area to protect against corrosion and to match the existing bodywork.
Each type of bumper requires distinct materials and methods for successful repair. Following these steps carefully can restore the bumper’s appearance and functionality effectively.


