


Maintaining good air quality in your vehicle is essential for a comfortable and healthy driving experience. One of the most critical components in achieving this is the cabin air filter. The cabin air filter is responsible for trapping dust, pollen, and other airborne pollutants from entering your vehicle’s cabin, ensuring that the air you breathe while driving is clean and fresh.
Over time, these filters can become clogged with debris, leading to reduced air flow and diminished air quality. Regular maintenance of your cabin air filter is not just a recommendation; it’s a necessity for anyone who spends a significant amount of time in their vehicle. In this article, we will guide you through the process of changing your cabin air filter, helping you understand when to do it and how to ensure optimal performance.
By understanding the importance of cabin air filters and recognizing the signs of a filter that needs changing, you can significantly improve your vehicle’s air quality. Follow these steps for an effective filter replacement, and enjoy a healthier driving environment.
Identifying the Right Cabin Air Filter for Your Vehicle
Choosing the appropriate cabin air filter for your vehicle is a crucial step in maintaining air quality inside your car. Here are key considerations to help you identify the right filter:
- Consult Your Owner’s Manual: The vehicle’s manual provides specific details about the cabin air filter type required, including dimensions and filtering capabilities.
- Know the Filter Types: There are various types of cabin air filters available, including:
- Particle Filters: These filters capture dust, pollen, and other airborne particles.
- Activated Carbon Filters: In addition to particles, these filters absorb odors and harmful gases.
- Check Compatibility: When purchasing a filter, ensure it’s compatible with your vehicle’s make and model. Many manufacturers provide guides online.
- Look for Quality Brands: Opt for well-known brands that produce high-quality filters for reliable performance and better air quality.
- Consider Replacement Frequency: Regular maintenance is key; check how often you should replace the filter, typically every 15,000 to 30,000 miles.
By understanding these aspects, you can effectively identify the right cabin air filter to enhance the maintenance of your vehicle’s air quality.
Step-by-Step Guide to Replacing Your Cabin Air Filter
Replacing your cabin air filter is an essential part of vehicle maintenance that significantly improves air quality inside your car’s cabin. Follow this step-by-step guide to ensure the process is smooth and effective.
Step 1: Gather Necessary Tools
Before you begin, collect the tools you will need for the replacement. Typically, you will need a screwdriver, a pair of gloves, and a new cabin air filter compatible with your vehicle’s make and model.
Step 2: Locate the Cabin Air Filter
The cabin air filter is commonly found behind the glove compartment or under the dashboard. Refer to your vehicle’s manual for specific instructions on where to locate it.
Step 3: Remove the Glove Compartment
If the filter is behind the glove compartment, gently push in the sides of the glove box to release it from the clips. Lower the compartment carefully to expose the casing that covers the air filter.
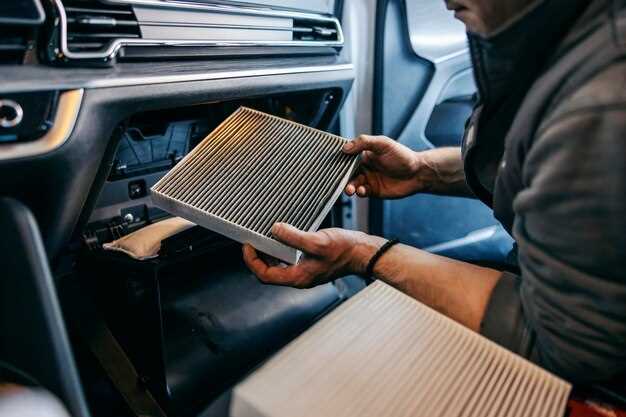
Step 4: Access the Filter
Release any clips or screws holding the cabin air filter cover in place. Once removed, carefully pull out the old cabin air filter. Pay attention to how it is oriented for correct installation of the new filter.
Step 5: Install the New Cabin Air Filter
Insert the new cabin air filter in the same orientation as the old one. Ensure it is seated properly and securely in its housing. This will help your AC system function efficiently.
Step 6: Reassemble the Glove Compartment
After the new filter is in place, reinstall the cover and secure it with clips or screws. Lift the glove compartment back into position and ensure it snaps back into place.
Step 7: Test the AC System
Turn on your vehicle and test the AC system to ensure it is blowing clean air. If you notice any unusual sounds or reduced airflow, double-check the filter installation.
Regular maintenance, including timely replacement of your cabin air filter, will enhance the quality of air inside your vehicle and maintain the efficiency of your AC system.
Maintaining Your AC System for Optimal Air Quality
Regular maintenance of your AC system is crucial for ensuring optimal air quality inside your cabin. One of the primary components that affect air quality is the filter. A clogged or dirty filter can restrict airflow and lead to an accumulation of dust, pollen, and other contaminants, which can compromise the air you breathe.
To maintain your AC system effectively, begin by checking the condition of the cabin filter at least every three months. Depending on your environment and usage, you may need to replace it more frequently. A clean filter not only enhances the quality of air circulating in your cabin but also improves the efficiency of the entire system.
In addition to replacing filters, ensure that all vents and ducts are free from blockages. Dust buildup in these areas can also reduce the effectiveness of your AC system. Regular vacuuming and cleaning can significantly help in maintaining proper airflow.
Don’t overlook the importance of professional maintenance services. Scheduling annual inspections with a qualified technician can identify potential issues before they escalate, ensuring that your air conditioning system operates smoothly and efficiently. During these visits, technicians can perform essential tasks such as cleaning coils, checking refrigerant levels, and inspecting for leaks.
By staying on top of AC maintenance and prioritizing clean cabin filters, you will not only protect your investment but will also enjoy a healthier indoor environment.


